Adding some custom flair to your Windows 11 experience is a fantastic way to personalize your digital workspace. With Microsoft’s latest operating system, you can customize folders to improve readability and productivity.
Although the functionality is not built-in by default, you can easily customize folders via free third-party software add-ons such as Rainbow Folders.
Installing the Rainbow Folders Extension
A straightforward way to organize Windows 11 is to customize the individual colors of each folder. With the Rainbow Folders program, you can color-code your files for massively improved organization.
– First, you must download Rainbow Folders and install it on your computer.
– After the download is finished, you can extract Rainbow Folders from the ZIP file stored on your PC.
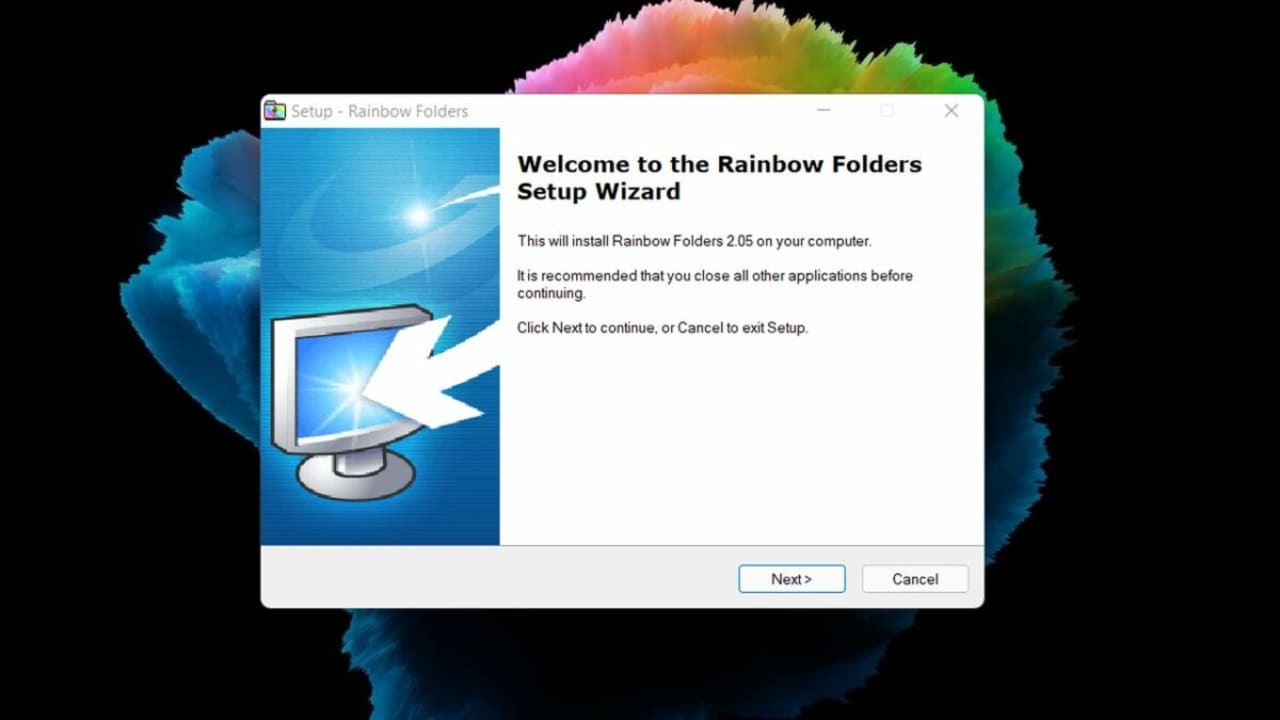
– Upon extraction, clicking on Rainbow Folders will initialize the setup wizard. Choose where you wish to save Rainbow Folders and click install.
Changing folder colors with Rainbow Folders
– Open Rainbow Folders from the location you installed it. If you are unsure of the exact location, you can use the Windows key + S shortcut and type Rainbow Folders into the search box.
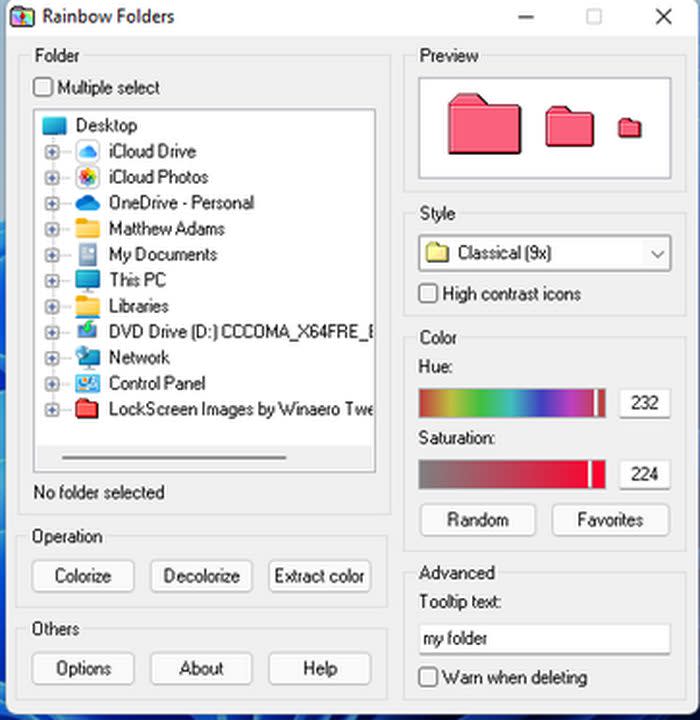
– Once inside, click This PC when asked to select a directory. As the list of folders appears, click on the one you wish to customize. If you would like to add the same tint to multiple folders simultaneously, click the multiple select option.
– The Rainbow Folders menu allows you to customize the color of your folders as you see fit. Drag the hue slider to alter the shade of the icon.
– If you want a truly custom color, adjust the saturation slider as well. When you are done, click colorize to apply your changes.
Check your work in file explorer
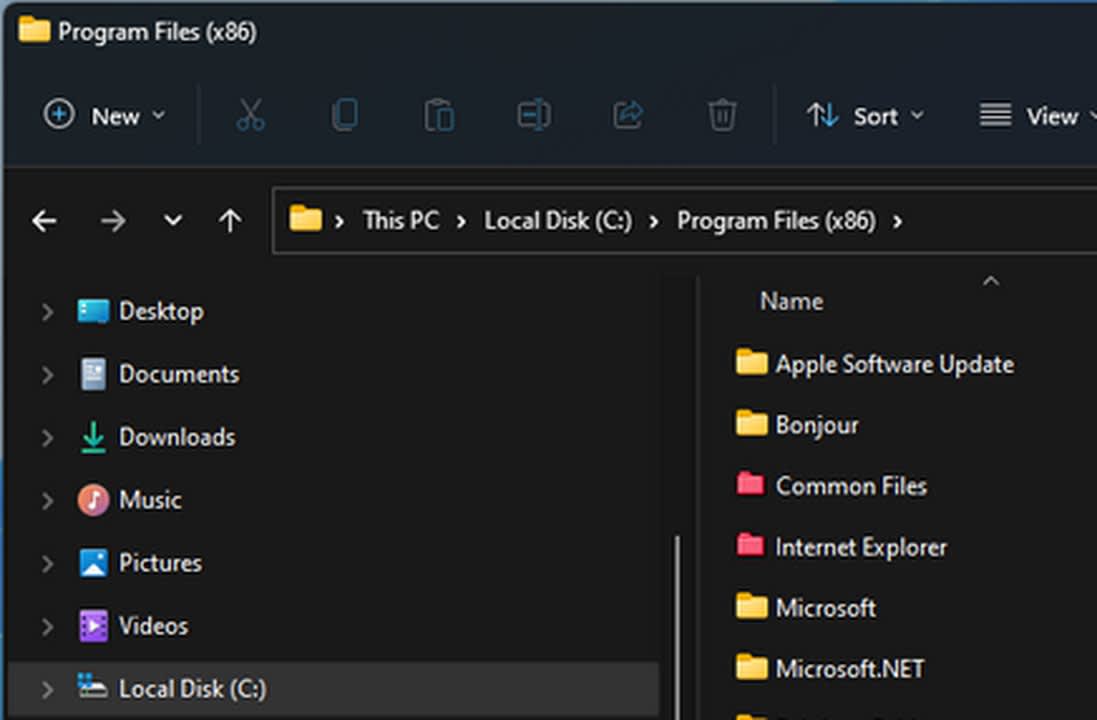
– Upon closing Rainbow Folders, navigate back to the directory that stores the folder you just customized. You may need to wait a few minutes for the change to take effect.
– After a refresh, your file explorer should include the folders with the colors you selected.
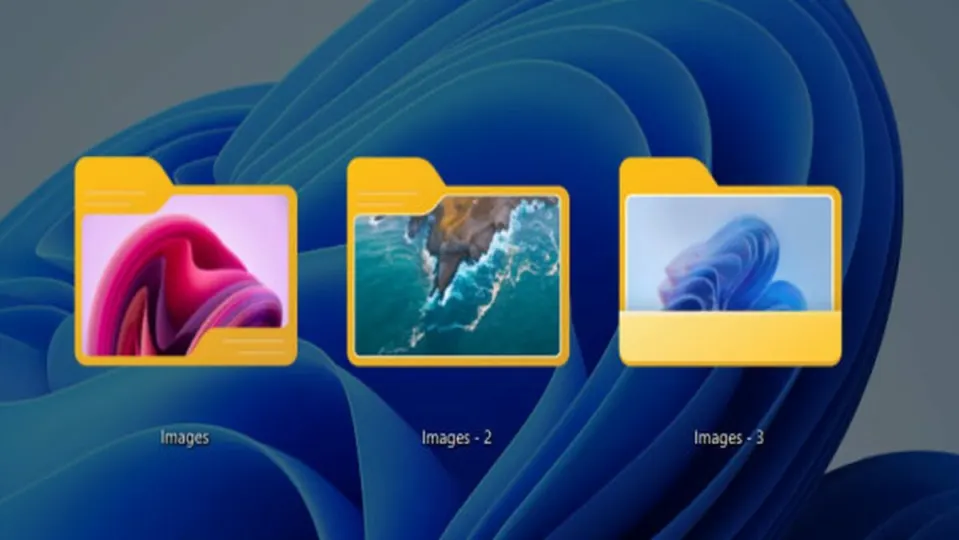
How to change folder thumbnails in Windows 11
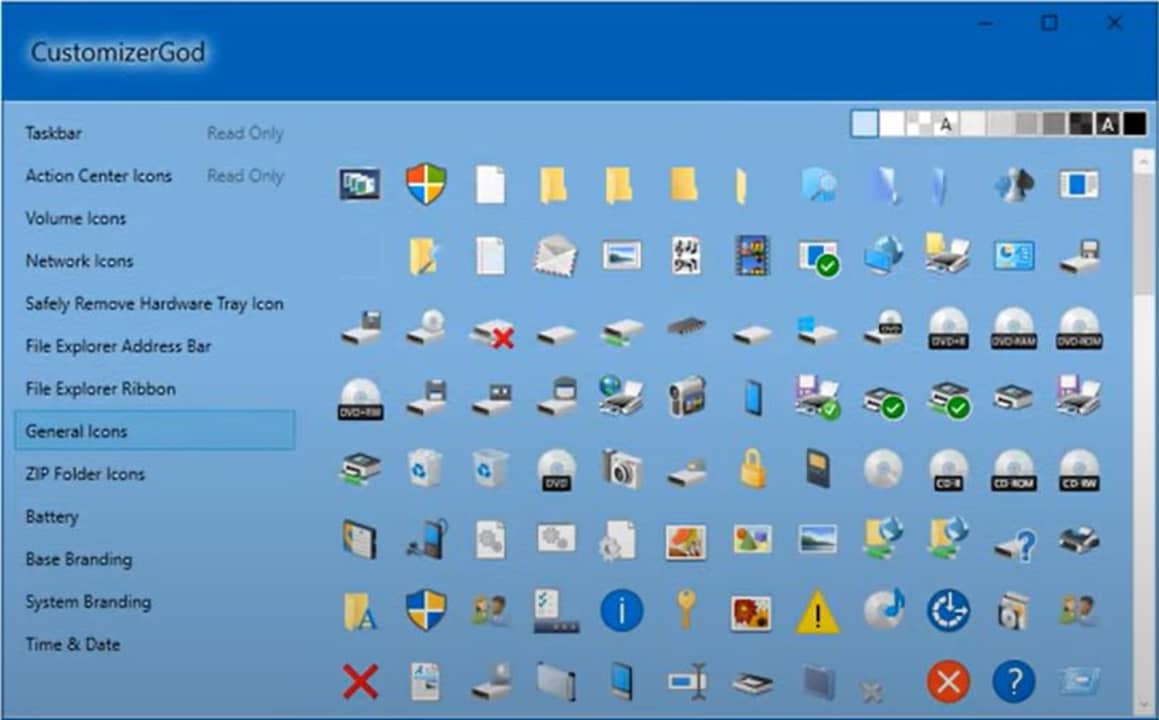
– Next, you can customize the thumbnail preview using the CustomizerGod extension. This app allows you to change the appearance of folder icons from one central location. You can download CustomizerGod here.
– Much like with Rainbow Folders, you may extract CustomizerGod wherever you like.
– Once inside the extracted folder, click CuztomizerGod.exe to immediately start using the software.
Backup the original thumbnail
In case you need to restore a corrupted folder thumbnail, it’s wise to back up the default look of any folder you customize.
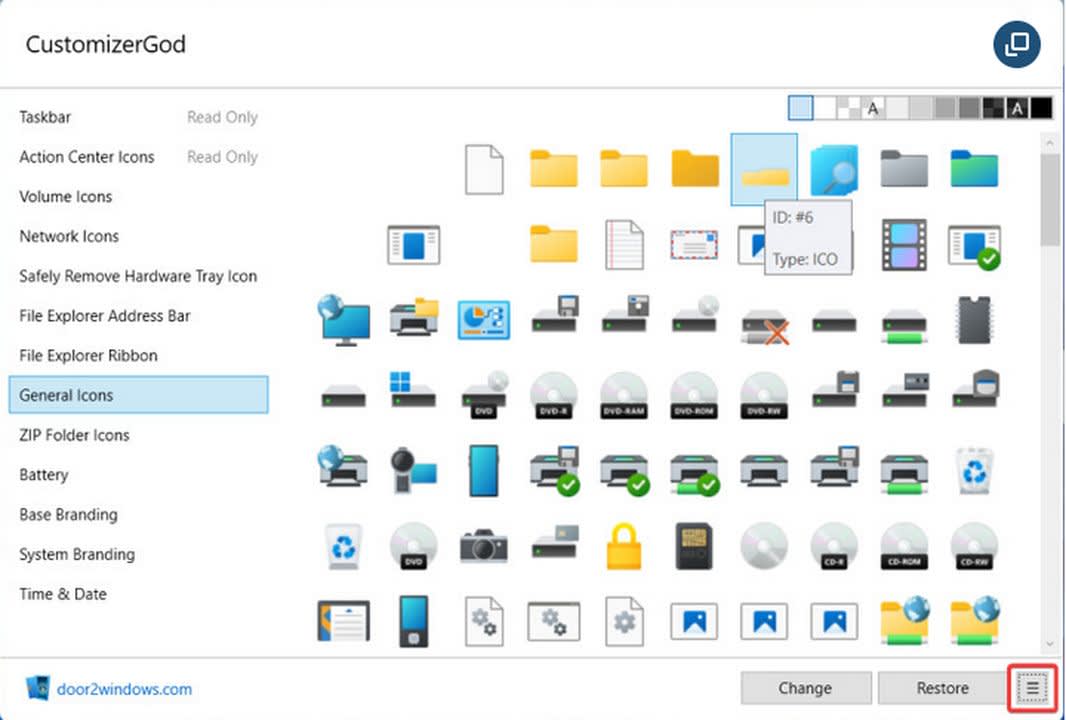
– To back up the default look, select any folder once CustomizerGod is open.
– Use the general icons tab to find folders. Once a folder is selected, click on the icon with three lines in the bottom-right corner of the window.
– Click on export resources to save a backup of the file somewhere on your PC. You may wish to create a new folder exclusively for thumbnail backups.
Create your thumbnail changes
Once the original file is safe, you’re free to customize to your heart’s content.
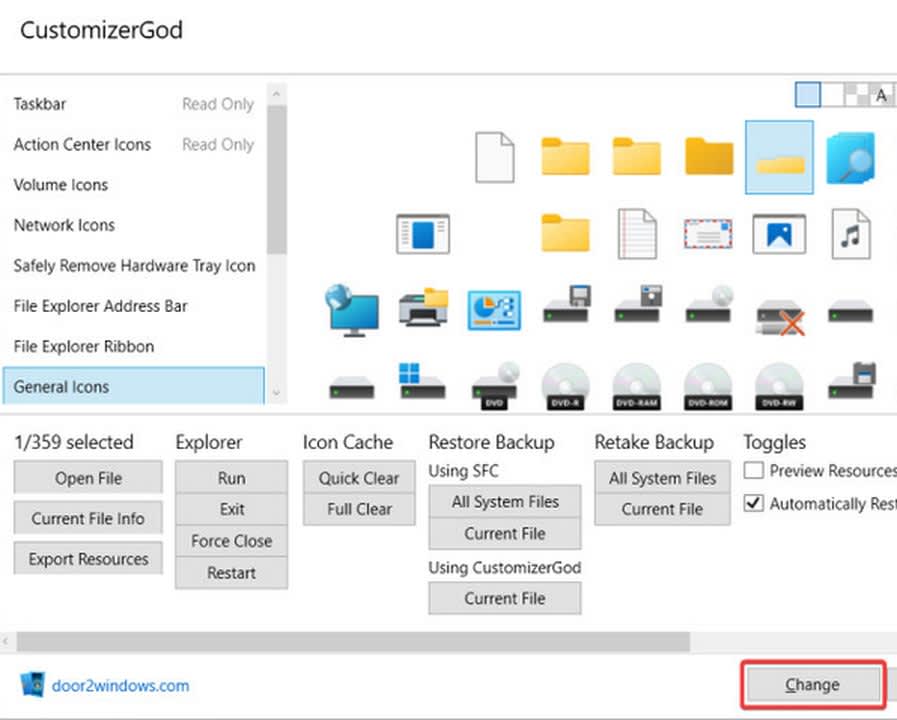
– Find the same folder from the previous step and this time click on the change button located at the bottom of the CustomizerGod program window.
– The change button opens a new file explorer window. Select any image on your PC that you wish to use as a thumbnail replacement. File explorer should automatically reset so the changes take effect.
– On the off chance the picture causes an error, you can simply revert to the original thumbnail using the backup created in the last step. Simply click on Rebuild Cache.bat from the CustomizerGod main folder.
Taking Windows 11 to the next level
This folder customization process is only the beginning of what can be done in Windows 11. If you wish to learn more, check out our guide on how to change the speed of your mouse cursor. Doing so is an excellent way to further enhance your productivity.