How To
Be more organized and enable tabs in File Explorer in Windows 11 build 25136
- June 30, 2022
- Updated: July 2, 2025 at 3:36 AM
Windows 11 is one of the most intuitive operating systems on the market. Microsoft is permanently working to bring you more features that make Windows 11 an even more capable and powerful operating system. One such feature is tabs within the Windows 11 file explorer interface. From what we’ve experienced with this new feature, it turns your file explorer into something more akin to a browser, like Microsoft Edge.
Traditionally, you can only access features like this by joining the Windows Insider program. From here, you’ll be able to access features that the company is still testing out and finalizing for a future wider launch. In the article that follows, we’re going to walk you through accessing this development feature right now!
How to get tabs in Windows 11 File Explorer: 5 super-simple steps
Before we get into the steps, just bear in mind that updating your system OS via the Windows Insider Dev Channel carries some risks. This software is still a work in progress, and as with any feature that isn’t at a point where it can be rolled out globally to all users, there may be some bugs.
As we’ve seen in the past, these early access Windows features can sometimes break the functionality of your PC. Therefore, it’s also never advised to test out Dev Channel builds on your primary device.
Important: In order for the feature update to take effect, your Windows 11 OS needs to be updated to build 25136 via the Windows Insider Dev Channel.
Get ViVeTool

To kick things off, you’ll have to download Vivetool from its Github repository. Scroll down to Assets, and then hit the first file you see; ViVeTool-v0.3.1.zip.
Extract

Once you’ve got the tool in your downloads, you’ll need to extract the files wherever you choose. I extract a ton of custom content for games, so I actually have a go-to sub-folder for extraction purposes within my documents folder in my C drive.
However, to make the next steps easier, I’d suggest saving your extracted files in a folder on your C drive named Vivetool.
Your Windows 11 PC has a built-in extraction utility, but for a little more control over the extraction process, try a free dedicated tool like 7zip.
Command and Conquer
This next step requires you to run a command. This is slightly less intimidating than the boot menu, but for many general PC users, this bit may feel like you’re messing with forces you shouldn’t be touching.
Essentially, while the command interface, and commands in general, look like some kind of low-level programming, it’s often just an easier way to get specific tasks done on your computer without having to go through the traditional menus and settings.
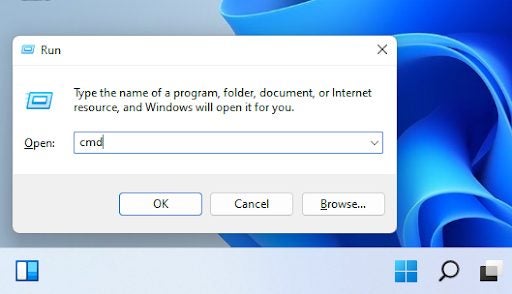
Press the Windows key + R to open the command utility. Next, you’ll need to type cmd into the dialogue box and then hit Ctrl +Shift + Enter. Your computer will now launch the Command Prompt utility as an Administrator.
Command Prompt
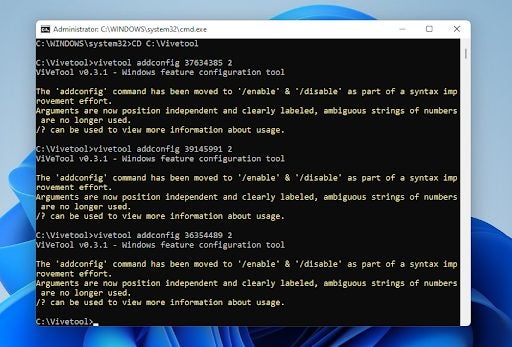
Command Prompt may look like a daunting utility too. Its bark is worse than its bite; don’t let the black screen intimidate you. All you need to do is type CD followed by the path to Vivetool’s location. In my case, I’ll type in CD C:\Vivetool. Hit Enter, and you should see a new string of values generated. At the end of the new string, type the following:
vivetool addconfig 37634385 2
Now hit Enter again.
Top tip: Many users say that simply using one configuration command isn’t enough to ensure that you get the new feature. To ensure that you get the new tabbed file explorer interface upon startup, use the following commands in addition to the one provided above:
vivetool addconfig 39145991 2
vivetool addconfig 36354489 2
Restart
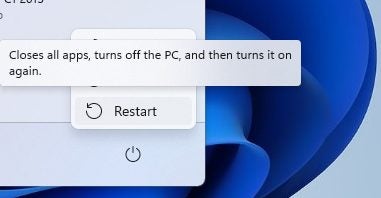
You’ll need to restart your PC for the changes to take effect, but once your system has restarted you should have the new tabbed interface for file explorer.
Just as a reminder, in order for any of these steps to work, you’ll need to have updated your Windows 11 version to build 25136. You can still go through the motions if you haven’t updated, it won’t break your system or anything, but it won’t add the new features upon startup.

Latest from Russell Kidson
You may also like
 News
NewsMarisa Abela joins Henry Cavill and Russell Crowe in the remake of a film that marked a generation
Read more
- News
It is leaked who could be Spider-Man's enemy: Brand New Day, and it is an old acquaintance
Read more
- News
Dune Awakening receives a new patch with over 300 changes that promises to change everything
Read more
- News
Thirty years later, this iconic movie directed by Tony Scott will have a sequel
Read more
- News
The rivals of Superman are confirmed ahead of his imminent release in theaters
Read more
- News
The development of the new Halo is wobbling after massive layoffs at Microsoft
Read more